A step-by-step guide to building your first SnowShoe app in under 10 minutes.
You’ve watched the videos, read about use cases, and played with the demos.
Now you are ready to build a SnowShoe application of your own.
But what do you do first? This guide will take you, step by step, through building a Hello World web application on the Snowshoe platform. When we’re done, you will understand exactly how the SnowShoe system works and how to integrate it into your own projects.
“Hello World”
Let's talk a little bit about what we want our app to do. To demonstrate the most basic functionality of the stamp, let's make an app that, when stamped, displays a hidden message specific to the stamp that was used.
In the finished product, if you stamp with Stamp A, the app returns “hello world”. If you stamp with Stamp B, you get “hello moon”.
Step 1: Register your app and get SnowShoe API credentials
First, we need to register our app with SnowShoe’s API. This will generate all of the credentials we will need to interact with the API endpoints.
The first thing you should do is login to the SnowShoe Developer Portal. This is your one-stop-shop for creating, modifying, and monitoring all of your SnowShoe applications.
Once logged in, you should see something that looks like this:

The Developer Portal is your one-stop-shop for creating, modifying and monitoring your SnowShoe apps
The applications view lists all of your SnowShoe applications. If you followed our First App Wizard, the app you created should be listed here.
Click the blue “New App” button. This will bring up an “App Details” page:
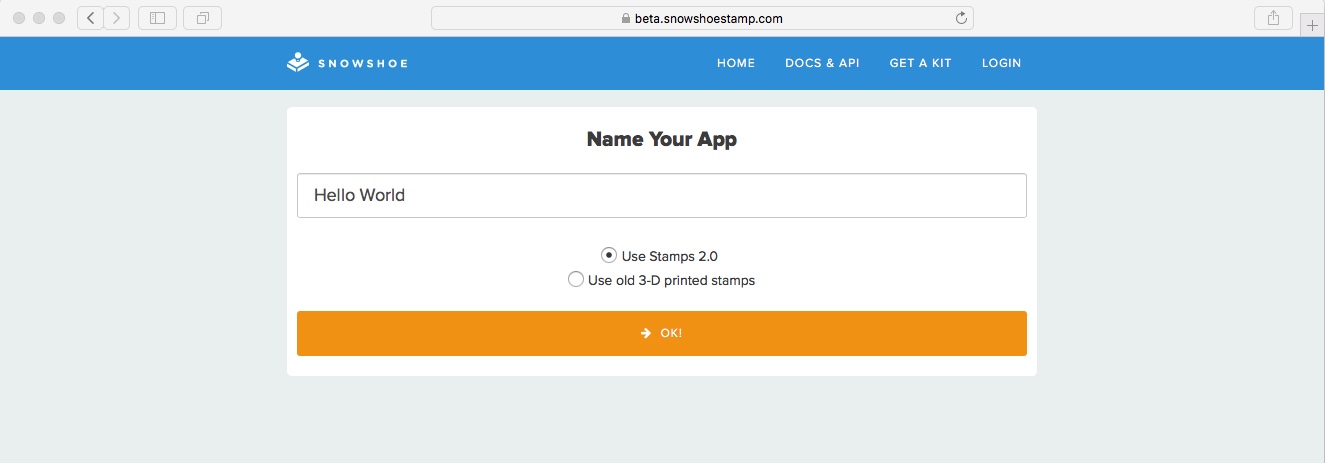
Enter a name in the "Name Your App" field. Most people will use "Stamps 2.0" so make sure that is selected and then click the "OK!" button.
All we need right now is a name. Enter the name of your choice and click “OK!” to continue.
Step 2: Getting Comfortable with the Stamp Screen
The App Details page shows your new application’s Name, Application Key, Application Secret, and three URLs (Stamp Screen, Debug Callback, and Serial Number Identifier) in the left column:
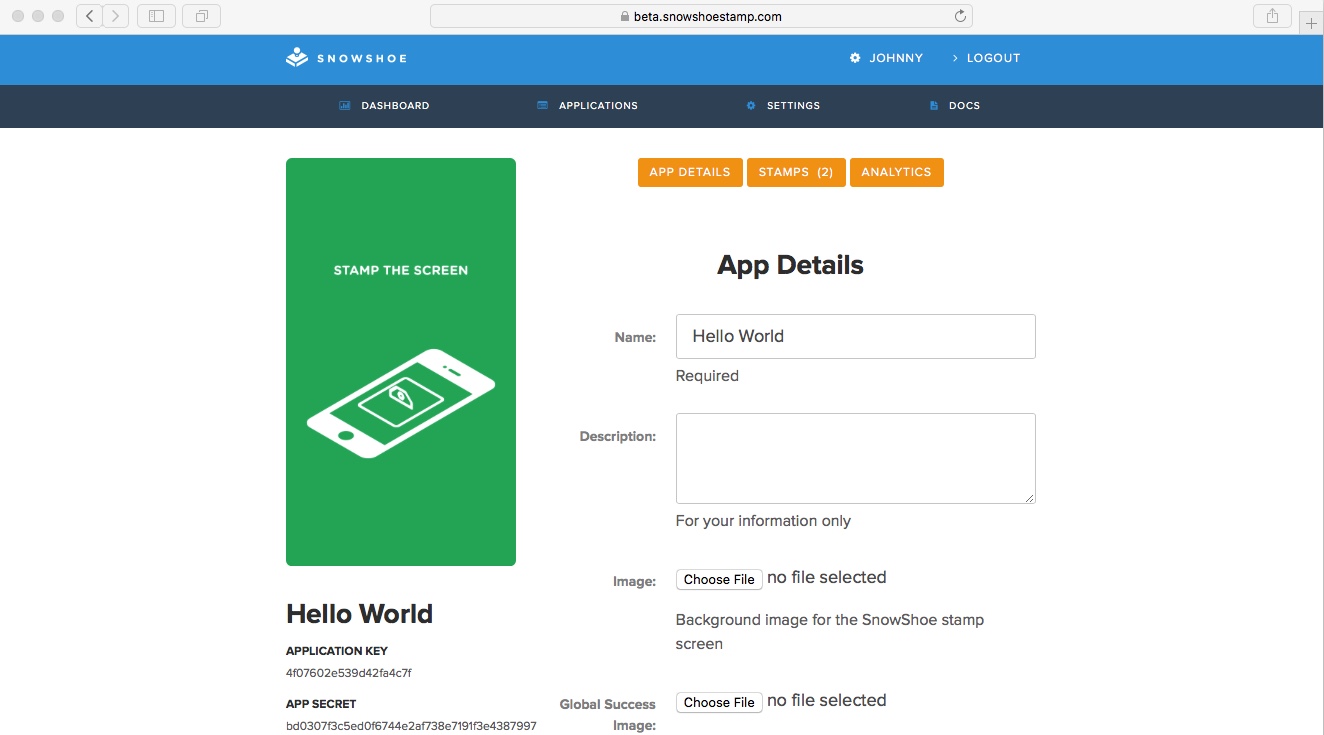
The first thing we are going to look at is the Stamp Screen link. The stamp screen is a webpage that observes a stamp interaction and reports the observed touch coordinates back to your app.
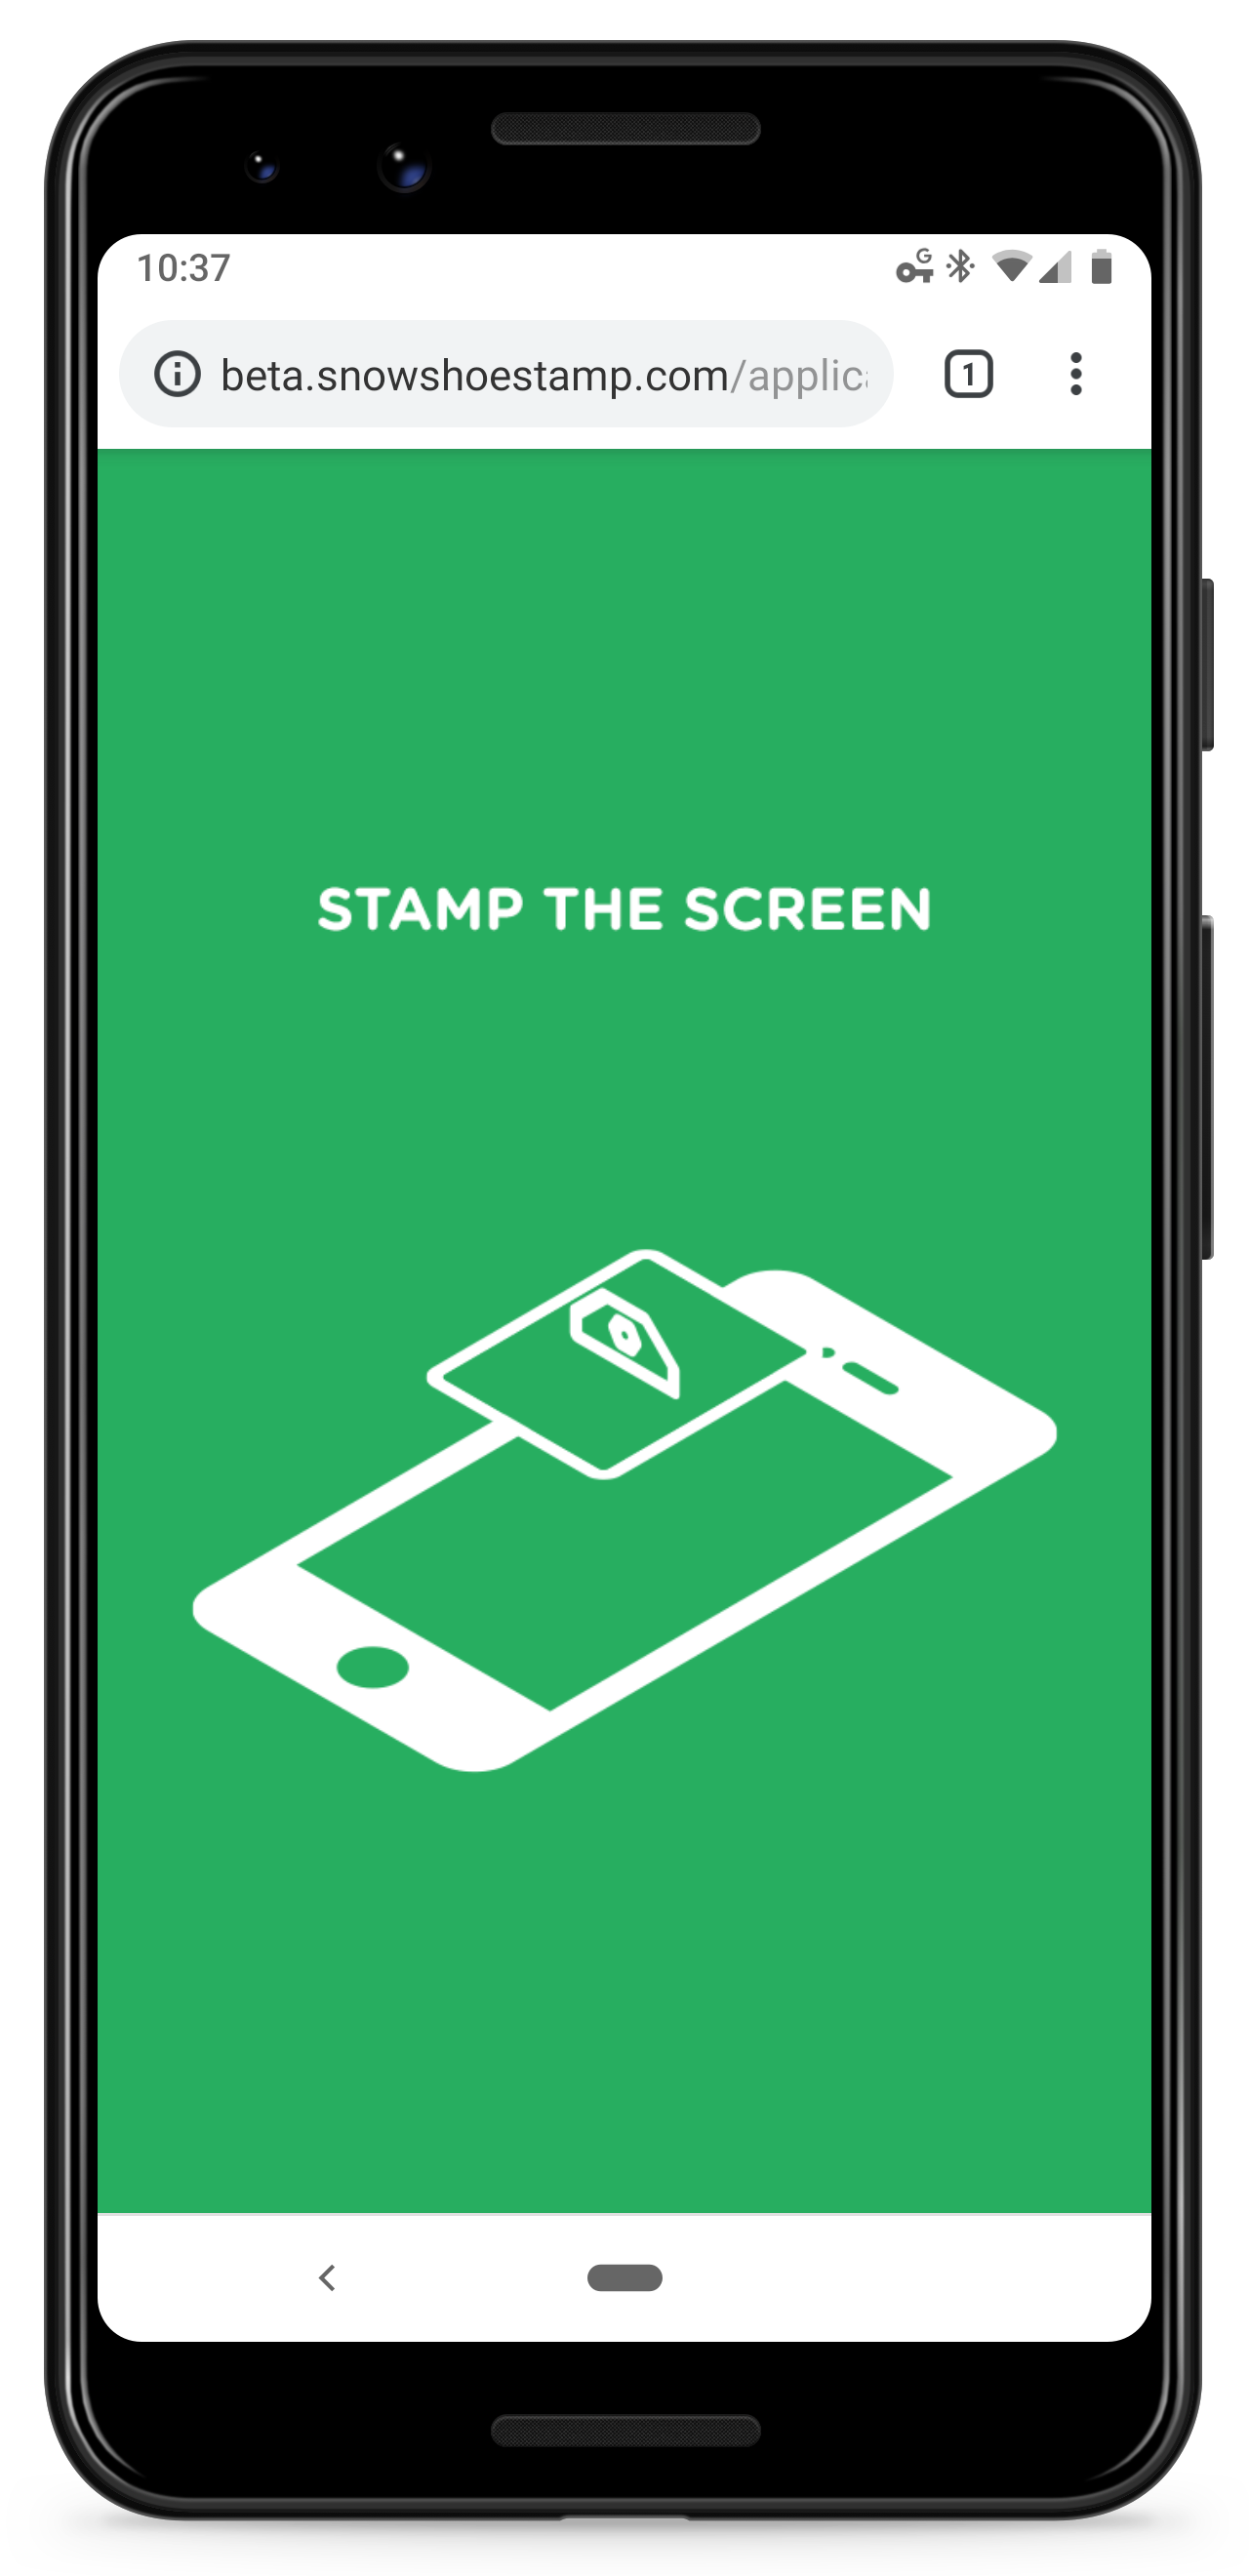
Your app’s default stamp screen will look like this. If you don’t like our nifty little animated GIF, you can upload a new stamp screen image on the Application Details page.
While you are more than welcome to build and host your own stamp screen (and we have stamp screen libraries and step-by-step docs available to get you started), we host one of these highly optimized stamp screens for each app you build, and they are certainly the fastest way for you to get an app up and running.
If you use the stamp screen we host, your app should redirect to this stamp screen URL whenever you want your user to use a stamp. Go ahead and click on the “send to mobile” button next to your stamp screen URL. We will send you an email with a link to your stamp screen. Open that link on your mobile device, and you should now see a stamp screen displaying our default stamp page.
Step 3: The Callback URL
If you stamp your screen with one of your stamps you will just see a JSON output printed on the screen. That's because we haven’t yet specified a callback URL. Your callback URL is the endpoint on your server that receives data from the stamp screen.
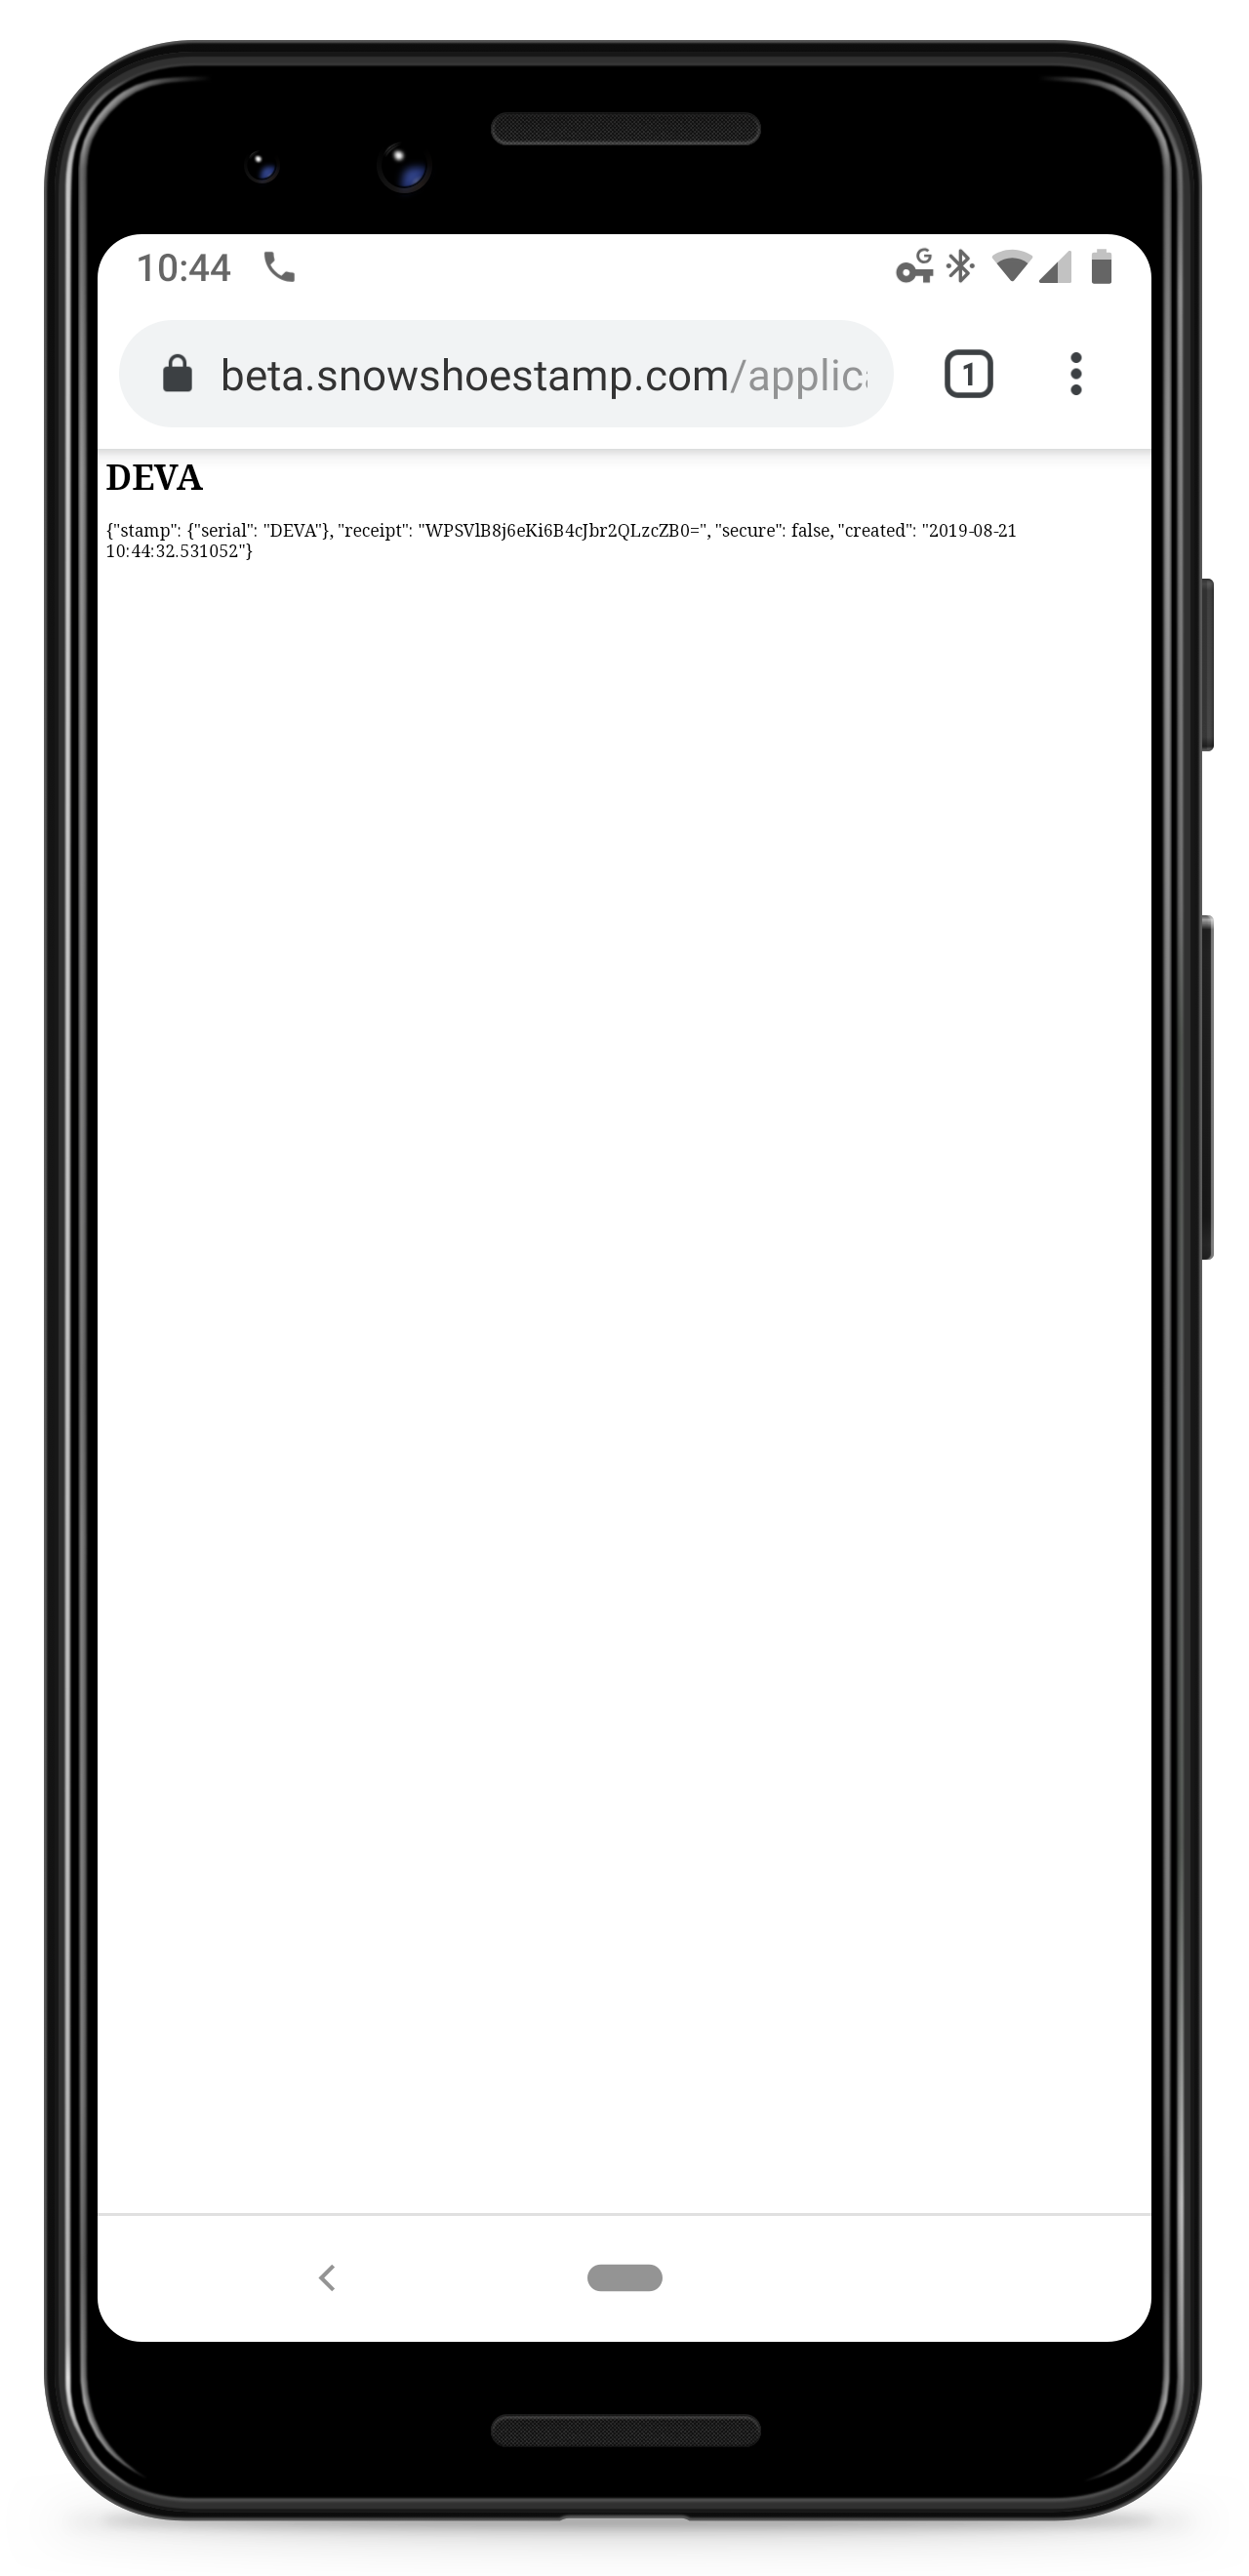
You can still stamp your application’s stamp screen without specifying a callback URL. Your stamp screen simply POSTs the data to a default endpoint on our system that calls our API internally and then outputs the API response. That endpoint is your debug callback.
However, you want your stamp screen to post data to YOUR endpoint, or callback, that lives on the server side of YOUR web or native application. Then you can call the SnowShoe API yourself and do things with the response.
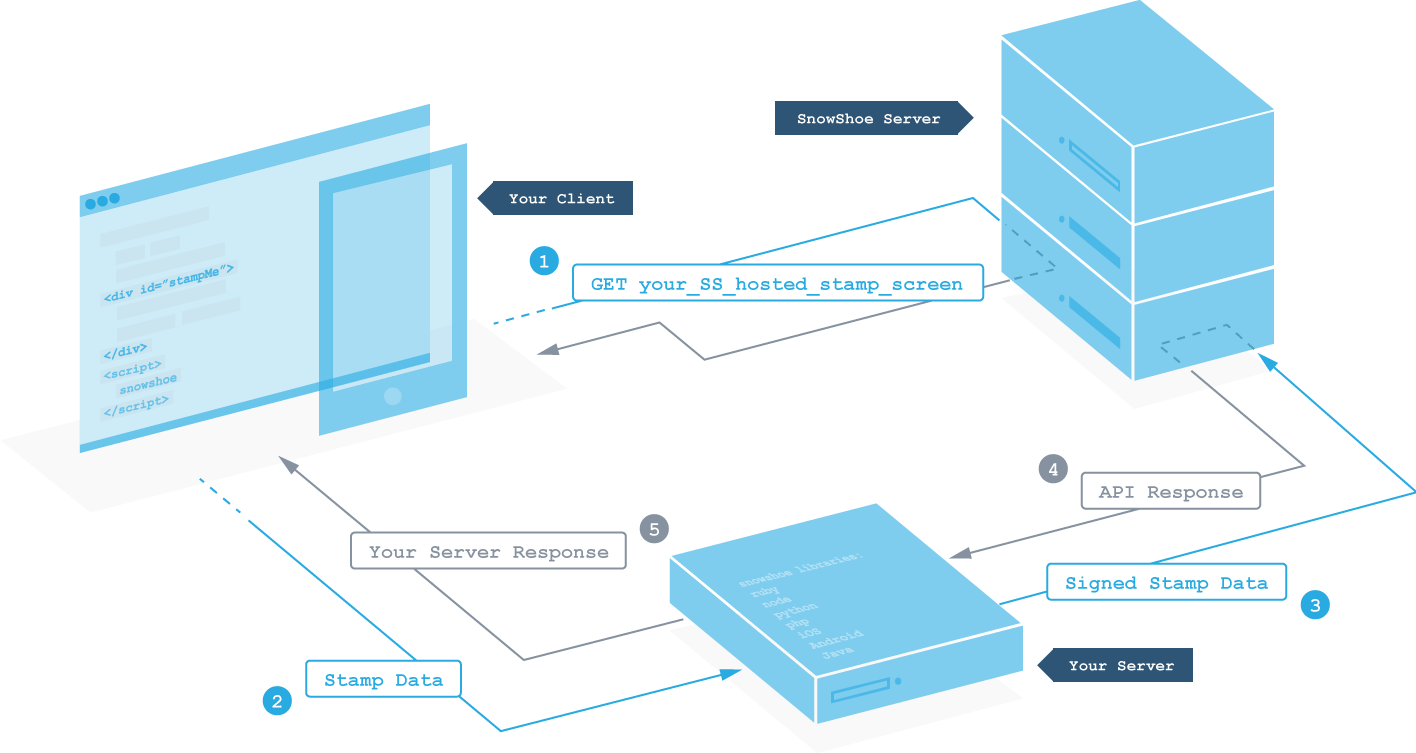
Your callback URL should map to a method on Your Server that includes one of SnowShoe's server-side libraries to sign the stamp data and submit it to SnowShoe's API for authentication.
Step 4: Building your callback.
Remember, we are building a callback that uses the SnowShoe-hosted stamp screen, so we need to have a server with a publicly-accessible URL.
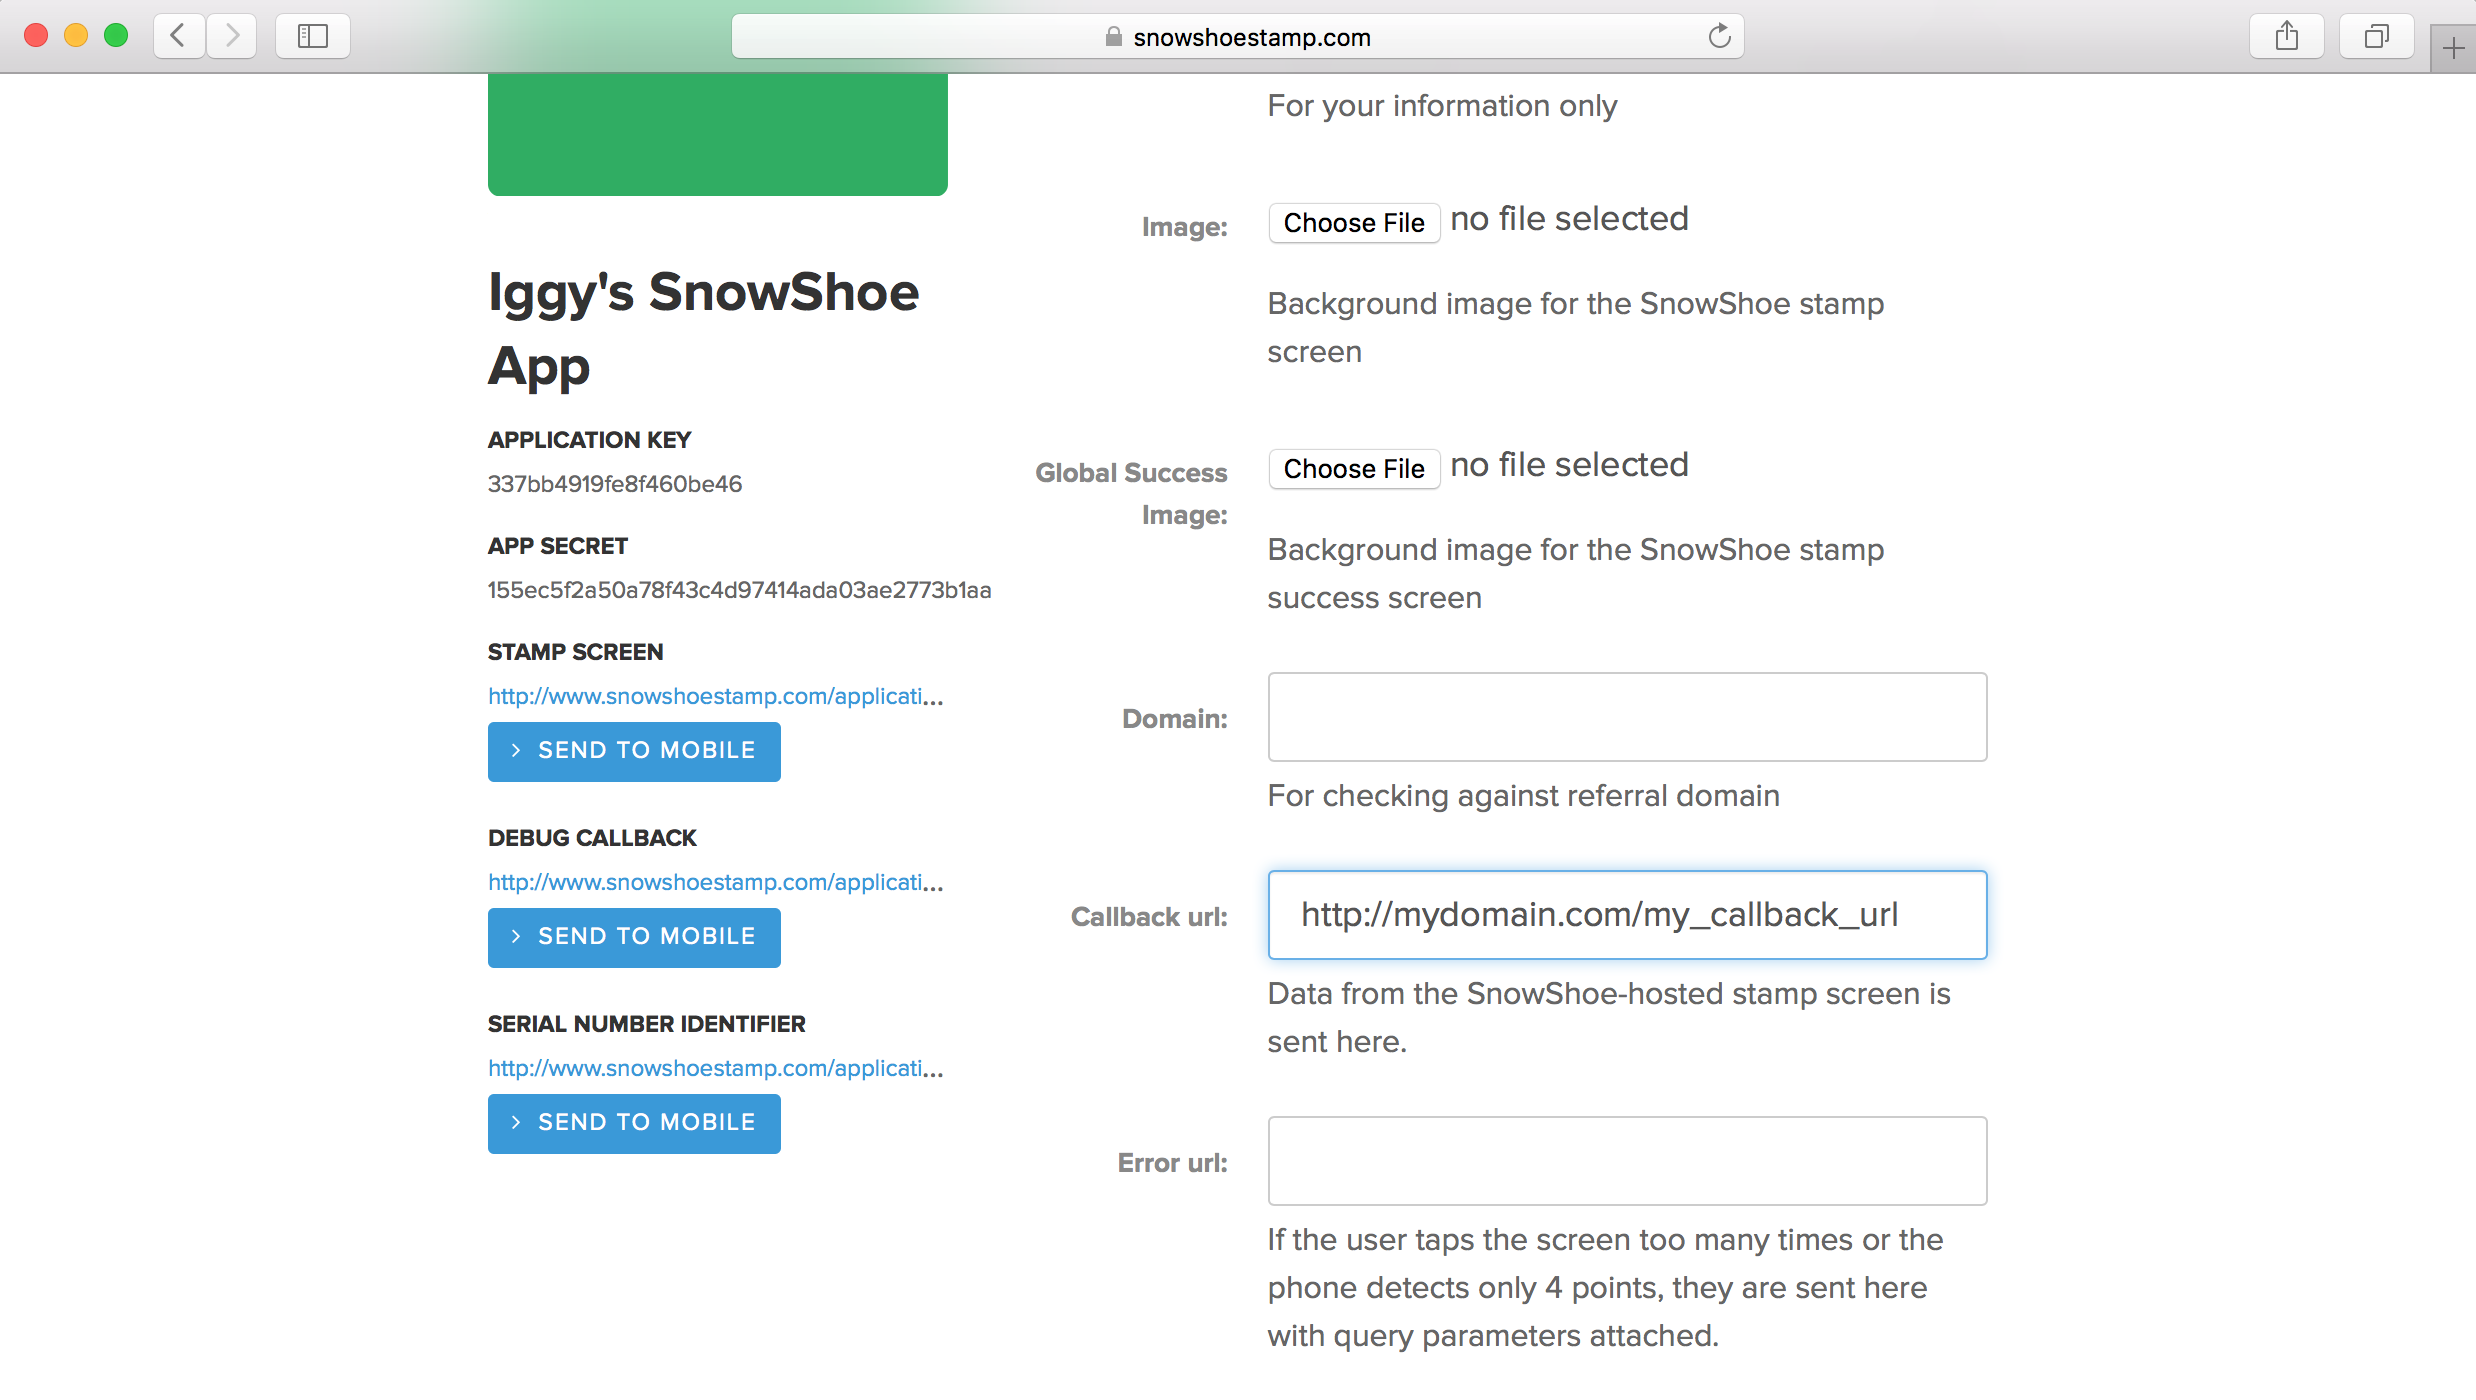
The data collected from your stamp screen will be sent to this publicly accessible URL that lives on your backend server
The idea here is that we need a server endpoint that a stamp screen can send data to. The data that the stamp screen is going to POST to this callback is called “data”, so, for instance, in Python you could access it as request.POST[‘data’] . That data then needs to be POSTed to our API using OAuth 1.0a, signed using your application secret, and the response will be JSON containing information about the stamp.
Posting to the SnowShoe API
To post to our API, you need to add one of our backend libraries to the server side of your web or native application. For specific directions and example code for parsing the response based on language, we provide the following resources. We maintain Ruby and Node.js libraries, a Python SDK and a PHP SDK which are easy assets you can use to build the OAuth request. Of course, you can build the OAuth request yourself, or there are community-supported libraries for languages other than those mentioned above.
The important part is that you take the data that is posted from the stamp screen to your callback, construct an Oauth 1.0a request around it, sign it with your application secret, and call our API using a POST request. The response from that request will be a JSON object containing information about the stamp event.
Important
Once you’ve got your callback set up and accessible via a public URL, you need to enter that URL into your app back in our developer portal. When you get to the app list after logging in, click on your app, scroll down to the Callback URL field, enter your URL that maps to the callback you set up on your app's server, and click Save.
Note
If you build and host your own stamp screen, you do not need to enter anything into the Callback URL field. In this case, you will use our SnowShoe jQuery library to submit stamp coordinate data directly from your stamp screen to the callback you set up on your app's server.
Step 5: Parsing the JSON response
Our API returns the following JSON if we’ve called it successfully:
{“stamp”: {“serial”: “DEVA”}, “receipt”: “o8FLLwYW7TVjtO4VTUP4IgQvvvI=”, “secure”: false, “created”: “2019-08-20 23:01:23.274865+00:00"}
You can see that the first element is a “stamp” object, with a “serial” attribute. That serial is the stamp’s “name”. While all developer stamps have the same serial number (DEVA or DEVB), when you move to production stamps, each stamp will have its own special serial number specific to your app.
Step 6: Making the Magic Happen
We now know which stamp our user touched to the screen, and we simply need to write some code inside the callback that displays the correct message for each stamp.
Here is the code for your callback in Ruby, Python and PHP:
require 'snowshoe'

def callback
  client = Snowshoe::Client.new(SNOWSHOE_APP_KEY, SNOWSHOE_APP_SECRET)
  data = { "data" => params["data"] }
  response = client.post(data)

  if response.include? "stamp"

    if response["stamp"]["serial"] == "DEVA"
      puts "Hello World"
    end
    if response["stamp"]["serial"] == "DEVB"
      puts "Hello Moon"
    end

  else
    puts "Stamp not found!"
  end
end
from sssapi import Client
from django.views.decorators.csrf import csrf_exempt
from django.http import HttpResponse

@csrf_exempt
def callback(request):

   client = Client(app_key="YOUR_APP_KEY", app_secret="YOUR_APP_SECRET")

   response = client.call({“data”: request.POST[‘data’]})

   if response.has_key(‘stamp’):

      if response[‘stamp’][‘serial’] == “DEVA”:
          return HttpResponse("Hello World")

      if response['stamp']['serial'] == "DEVB":
           return HttpResponse("Hello Moon")

  else:
      return HttpResponse(“Invalid Stamp!”)
include ("./inc/SSSApiClient.php");
$app_key = "YOUR_APP_KEY";
$app_secret = "YOUR_APP_SECRET";
$data = $_POST[‘data’];
$client = new SSSApiClient($app_key, $app_secret);
$JSONResponse = $client->processData($data);
$response = json_decode($JSONResponse, true);

if(array_key_exists(“stamp”, $response)){

  $serial = $response[‘stamp’][‘serial’];

}else{
   $serial = false;
}
if($serial==”DEVA”){
   echo “Hello World”;
}
if($serial == “DEVB”){
   echo “Hello Moon”;
}
if(!$serial){
    echo “Stamp not found!”;
}
The key is that your callback leverages the serial number of the stamp that was returned to make your app do something special. Here it is simply a “Hello World” message. But the possibilities are limitless.
That was fun, but what’s next?
There are a whole bunch of ways you can customize the SnowShoe stamp screen. Learn more here. You can also associate individual images with particular stamps by following this quick tutorial here.
Have additional questions or would like to order a demo kit? Don't hesitate to email us at [email protected].
