Making HTML elements "stampable"
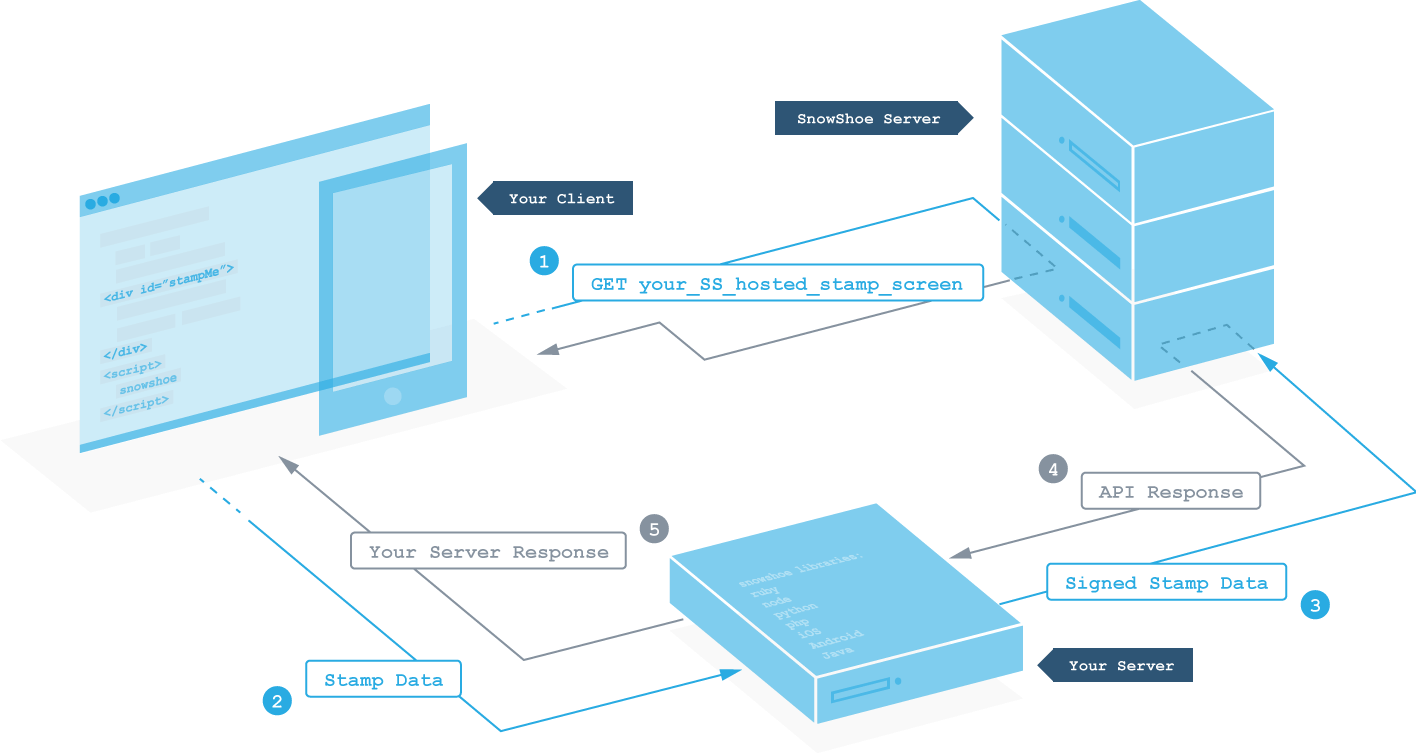
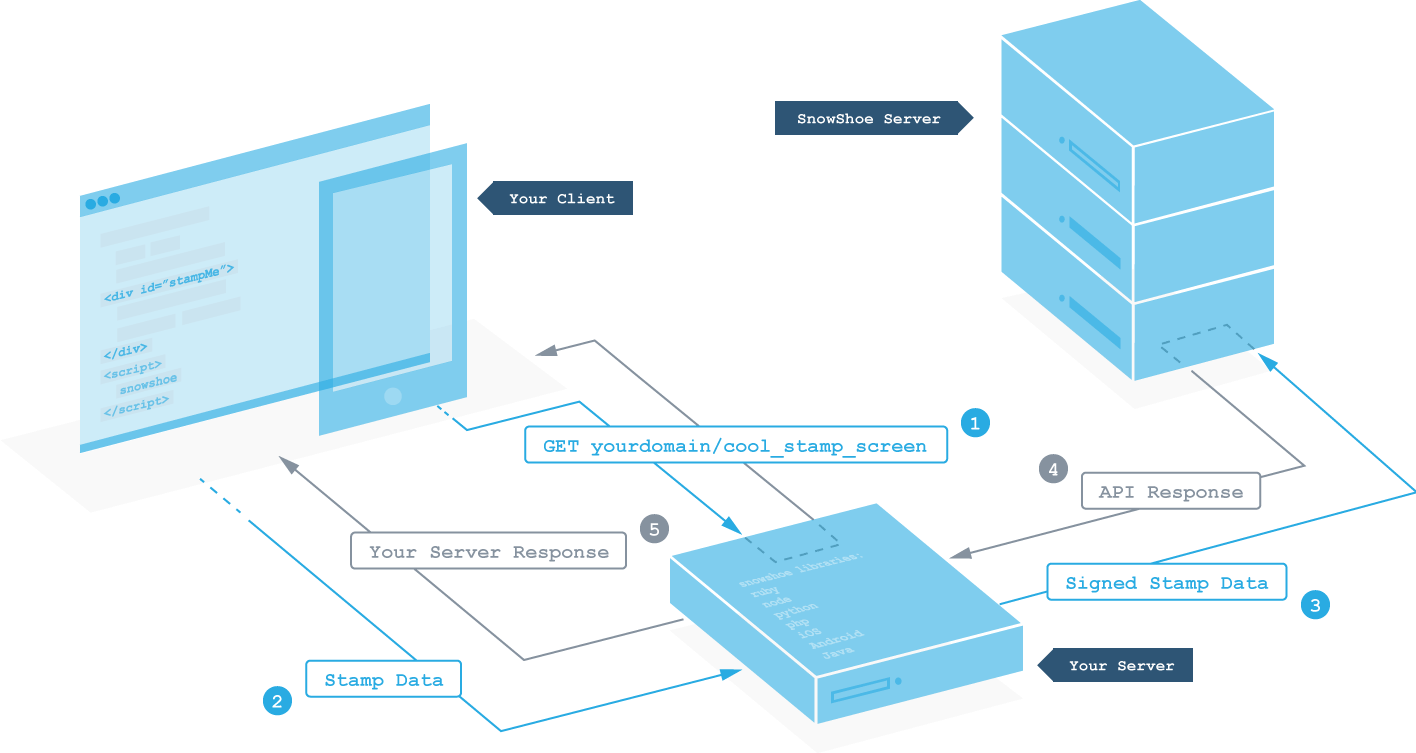
There are two different types of stamp screens: SnowShoe-hosted or self-hosted.
SnowShoe-Hosted Stamp Screen
For directions on implementing this, check out our Hello, World article. Your workflow will look like the following:

You can find the URL of your SnowShoe-hosted stamp screen on the dashboard page for your application.
Self-hosted Stamp Screen
If you would like to make an existing page of your web or native application "stampable," you just need to implement our jQuery plugin. Your workflow will look like the following:

Any webpage or native app screen can be made stampable. This is great for "hidden" content, as the page maintains normal button and click functionality unless a stamp is touched to the screen.
- SnowShoe's jQuery project can be found here on GitHub or you can use our CDN.
SnowShoe CDN
SnowShoe jQuery Module:
-- https://cdn.snowshoestamp.com/snowshoe-jquery/0.3.3/jquery.snowshoe.js
-- minified: https://cdn.snowshoestamp.com/snowshoe-jquery/0.3.3/jquery.snowshoe.min.js
// The jQuery namespace created by
// jquery.snowshoe.js
$.snowshoe
At the bottom of any page you want to make "stampable", create an object with initialization data and include the Snowshoe jQuery module. $.snowshoe will construct the necessary touch event listener and client to submit stamp data to your backend.
<canvas id="stamp-screen"></canvas>
.
.
.
<!--  Make sure you have sourced jQuery somewhere above this -->
<script>
  var stampScreenInitData = {
    "postUrl": "http://mydomain.com/stampscreen",
    // this is the element id of what you want to make stampable
    // this can be on a canvas, div or the body
    "stampScreenElmId": "stamp-screen"
  }
</script>
<script src="jquery.snowshoe.js"></script>
Optionally, post via AJAX by adding the postViaAjax property and setting its value to true. Then handle success/failure in the client.
<script>
  var stampScreenInitData = {
    "postUrl": "http://mydomain.com/stampscreen",
    "stampScreenElmId": "stamp-screen",
    "postViaAjax": true,
    "success": function(response){
      // handle success
      console.log("Success!");
    },
    "error": function(response){
      // handle failure
      console.log(" :-( ");
    }
  }
</script>
<script src="jquery.snowshoe.js"></script>
Want to add a loading animation?
The SnowShoe jQuery plugin comes prebaked with loading animation functionality. Check out how to use it here.
Want to add helpful messages to encourage a great user experience?
User training has been added as of the v0.3.0 release. Train users to stamp correctly by utilizing our new dynamic messaging feature. It allows you to display custom messaging onscreen to guide users toward best stamping practices depending on how they're using the stamp. Check out how to add help messages here.
Handling success and errors is covered in depth in Part 3: Handling API Responses.
